Appearance
Back End
Setup Back End side
Access the link https://bitbucket.org/tcipf-suite/tci-atm-backend/src/main/ Click on The Repository Settings then select Repository variables
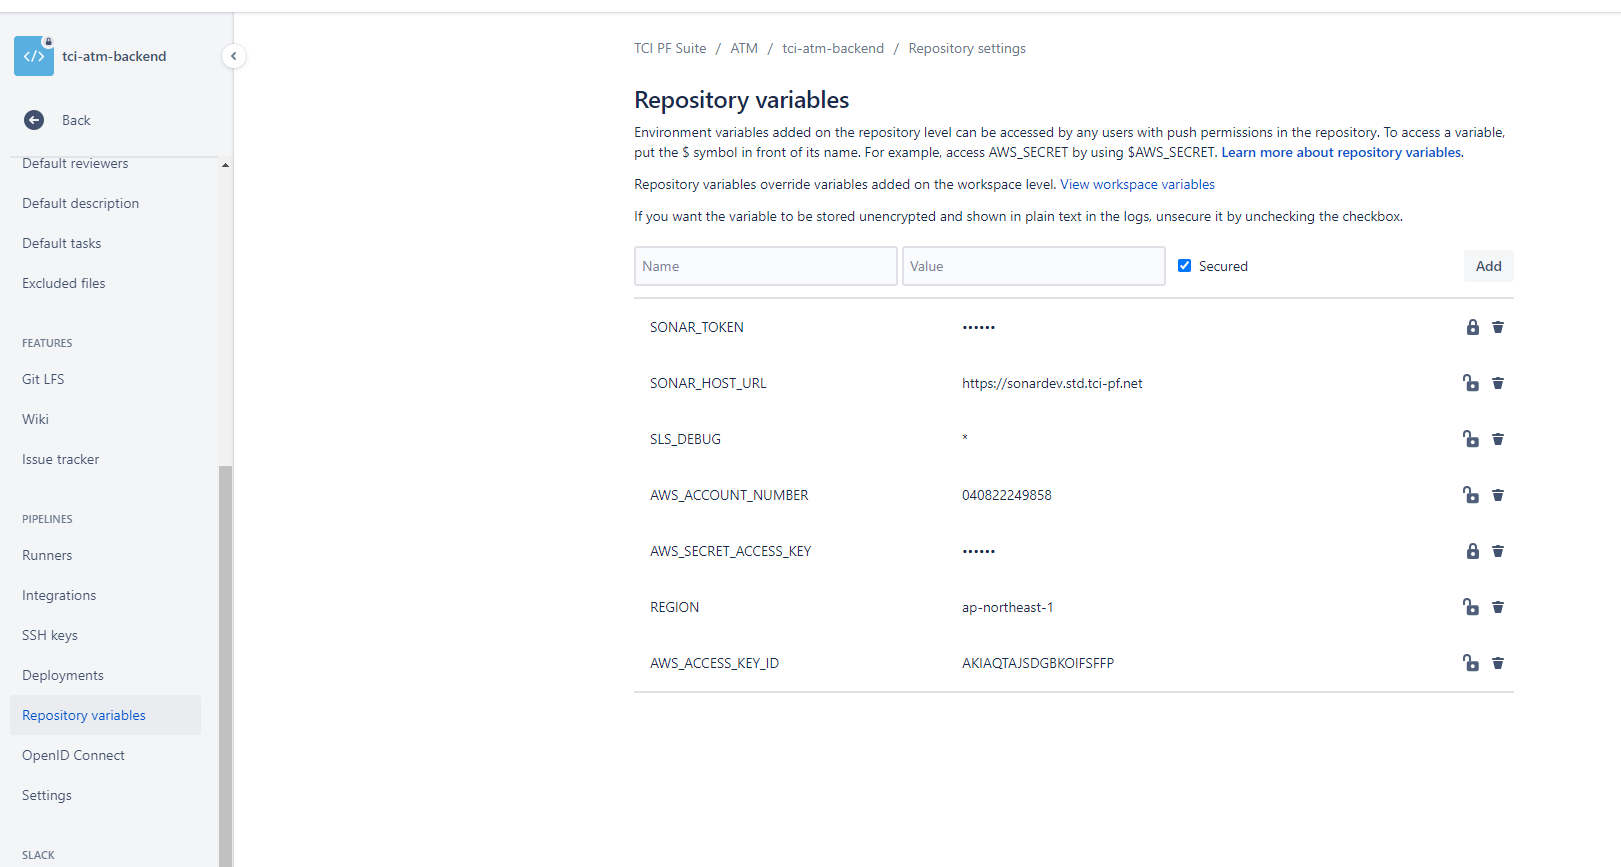
On this screen, we check variables below:
SONAR_TOKEN, SONAR_HOST_URL, SLS_DEBUG, AWS_ACCOUNT_NUMBER, AWS_SECRET_ACCESS_KEY, REGION, AWS_ACCESS_KEY_ID
Users can override the existing Keys with others to fit with the new environment expectation. Here are steps to guide the user on how to override the Keys:
a. Click on the Deployments menu
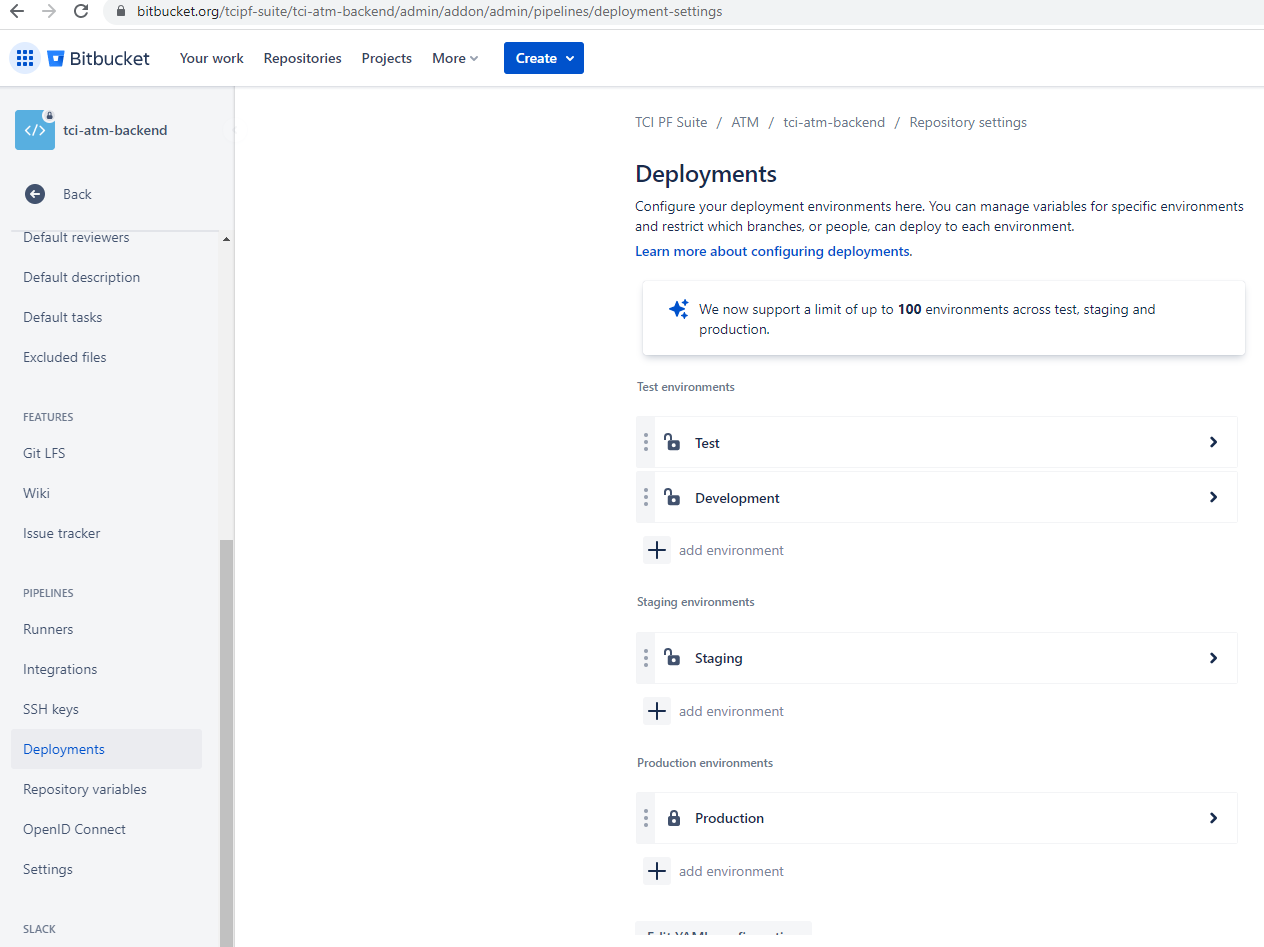
b. Users can input some setting values or override keys were inputted in Repository variables on the Production environments.
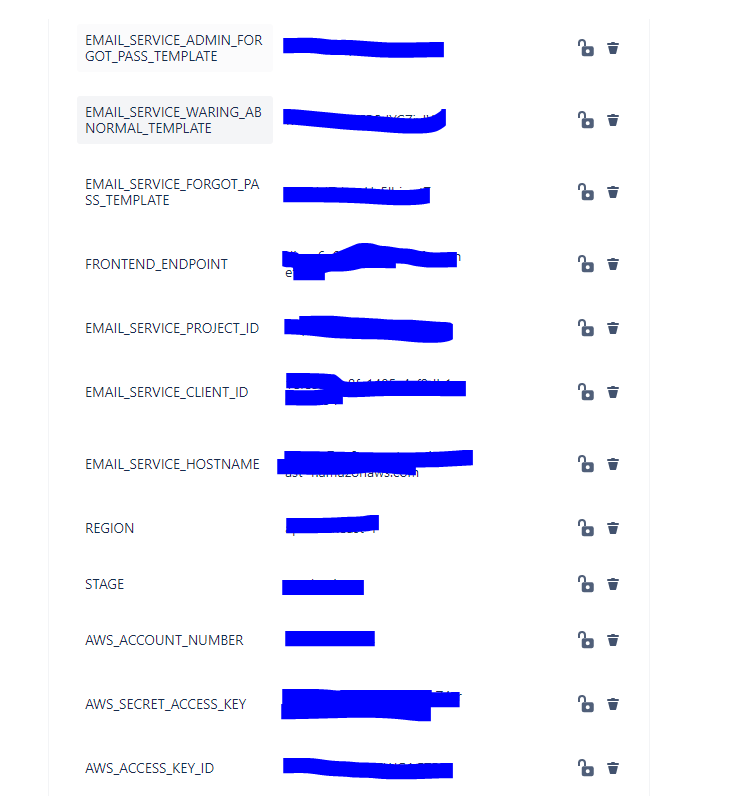
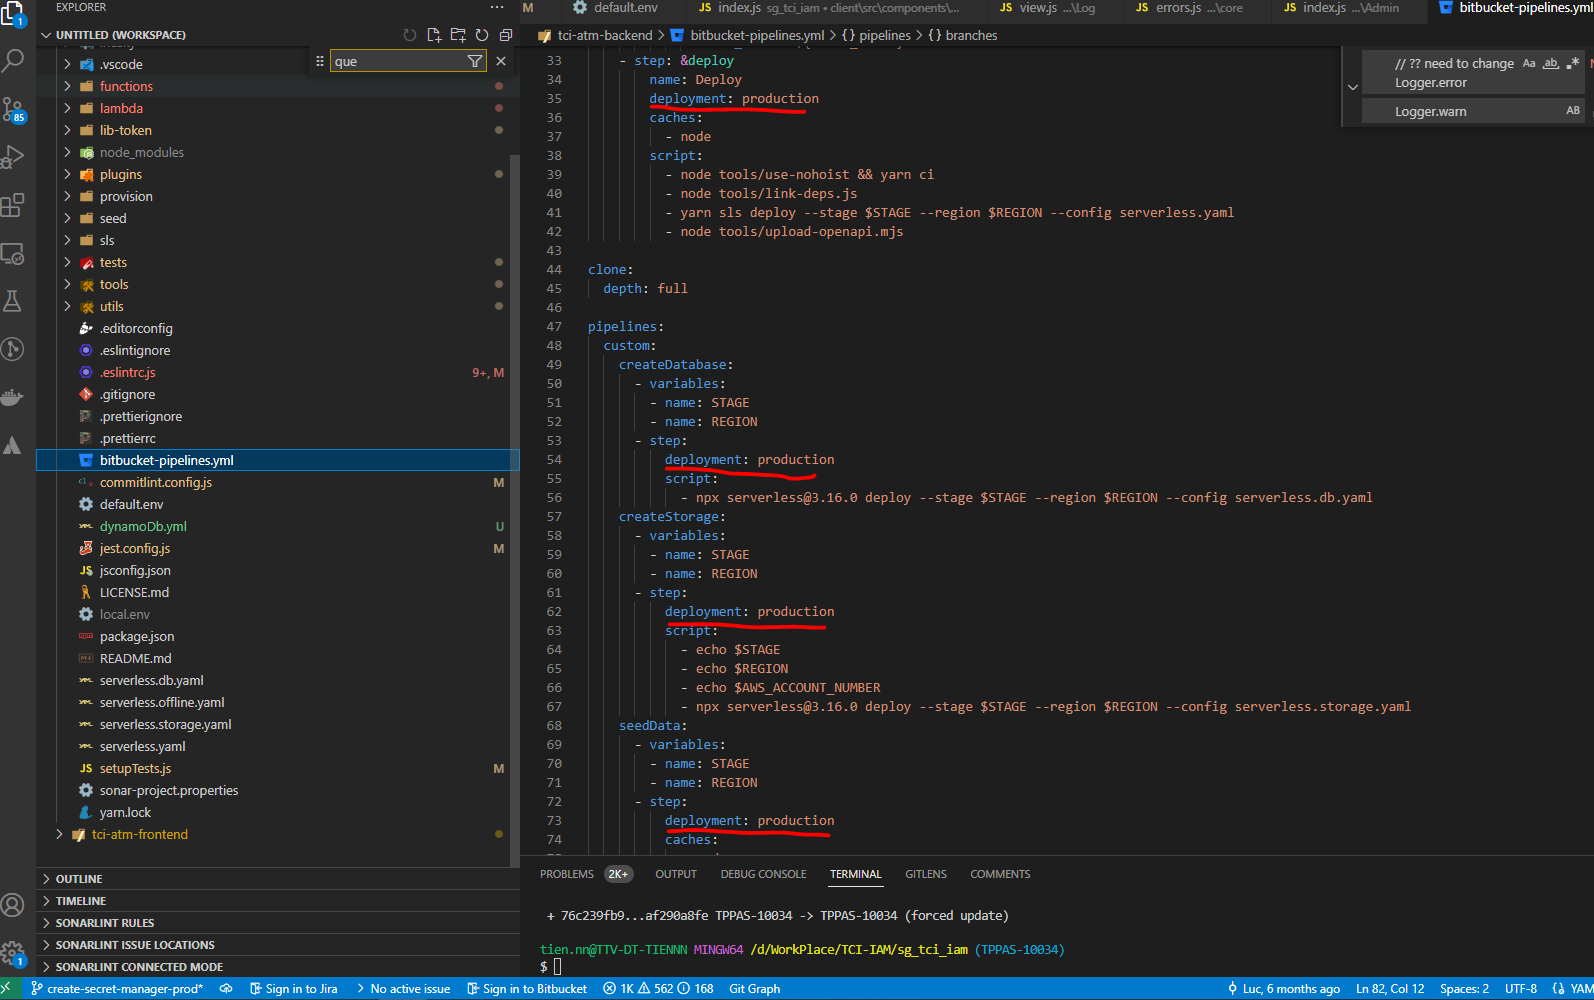
c. For sample, these are keys that need to be deployed for the new Back End environment.
d. After writing the variable on Bitbucket, the User clones the Back End source code from Bitbucket and then adds it to a new environment in the Bitbucket-pipelines file by configuration to development: production. Please refer the highlighted points below
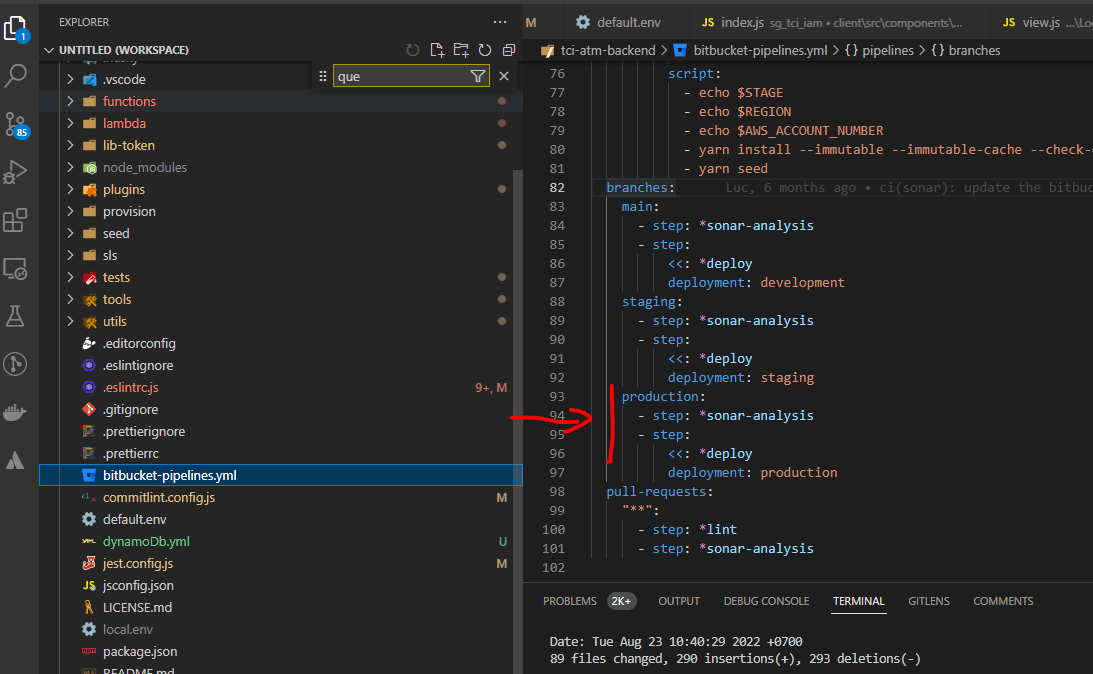
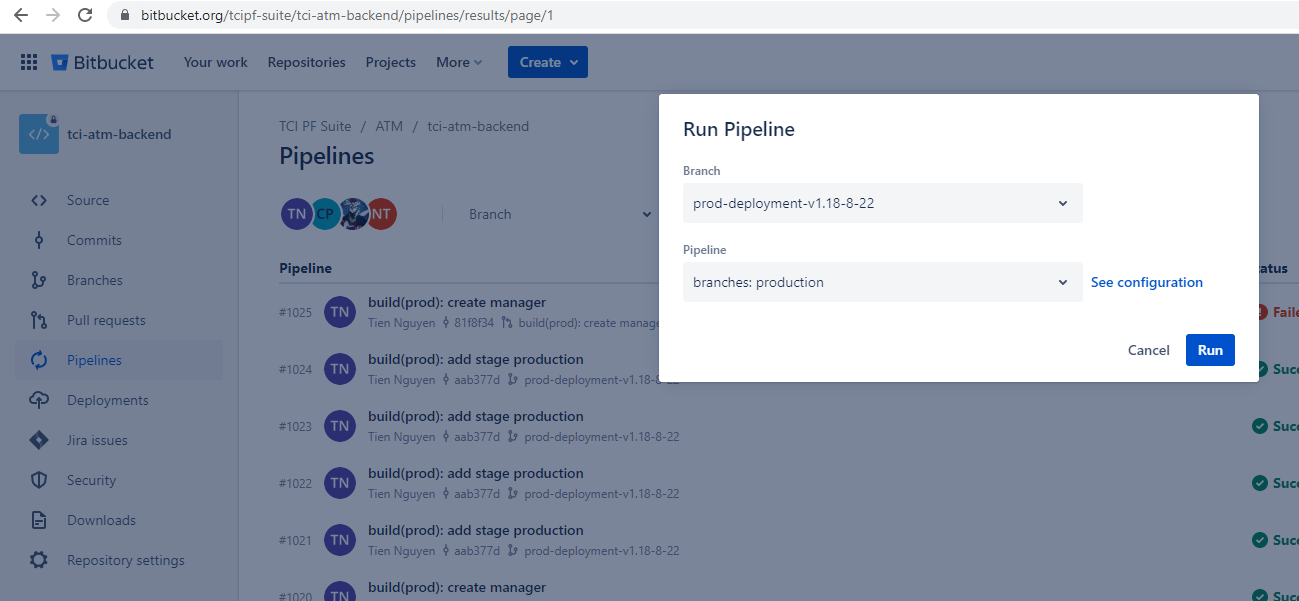
Once the Bitbucket-pipeline file is changed successfully, the User will push the source code to the Production branch to start the deployment period by following steps following:
- Branch: Production
- Pipeline: Production
Verify data on AWS, dynamodb, and S3 to ensure that the data has been inserted completely. Otherwise, If not existing in in dynamodb tables or S3 folder can’t create as expected, the user will run commands as follows:
a. Run custom: createDatabase
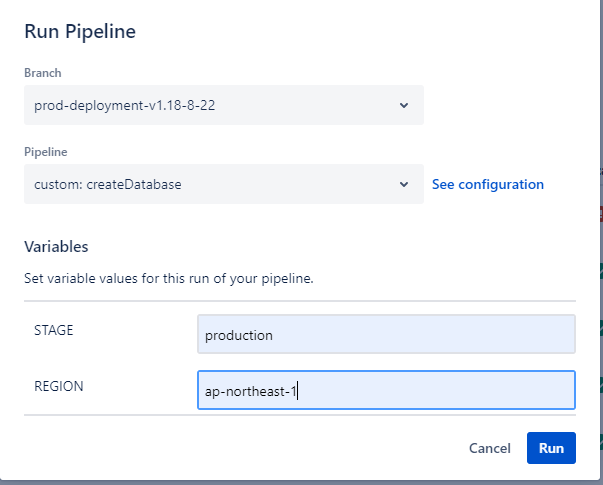
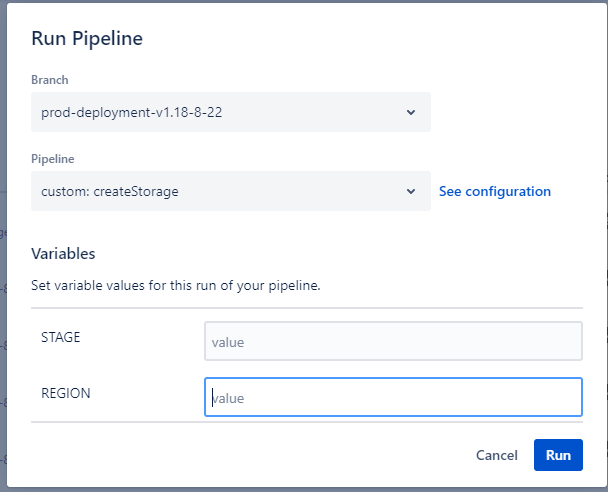
b. Run custom: createStorage
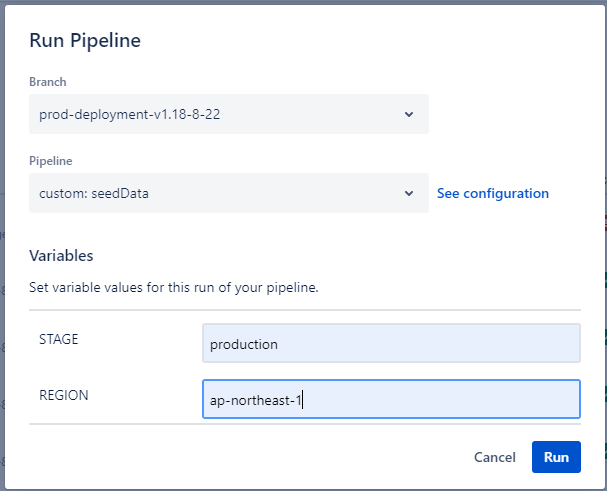
c. Run seedData: At the meantime, The Bitbucket pipeline runs seed yarn file automatically.
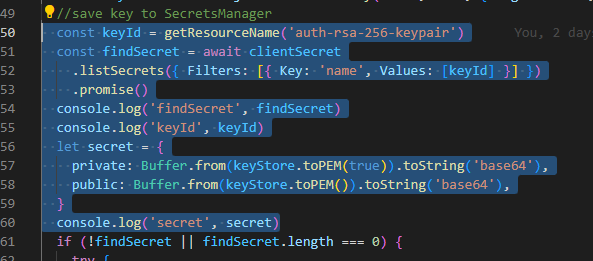
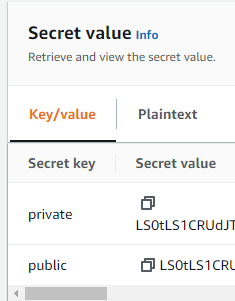
Caution: when running seedTpassport() , A ‘secret manager’ is created to login ATM by the name ‘secret manager’
About keys, Both Privatekey and Publickey will be encoded with base64.
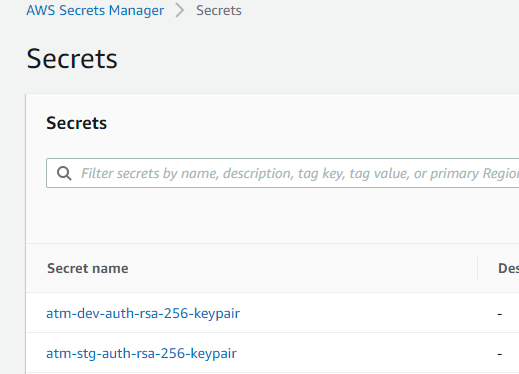
Click on ‘atm-stg-auth-rsa-256-keypair’ to view the PrivateKey and PublicKey information to access the Production site.