Appearance
Client Credentials
Instructions on how to integrate client credentials
With machine-to-machine (M2M) applications, such as CLIs, daemons, or services running on your back-end, the system authenticates and authorizes the app rather than a user. For this scenario, typical authentication schemes like username + password or social logins do not make sense. Instead, M2M apps use the Client Credentials Flow, in which they pass along their Client ID and Client Secret to authenticate themselves and get a token.
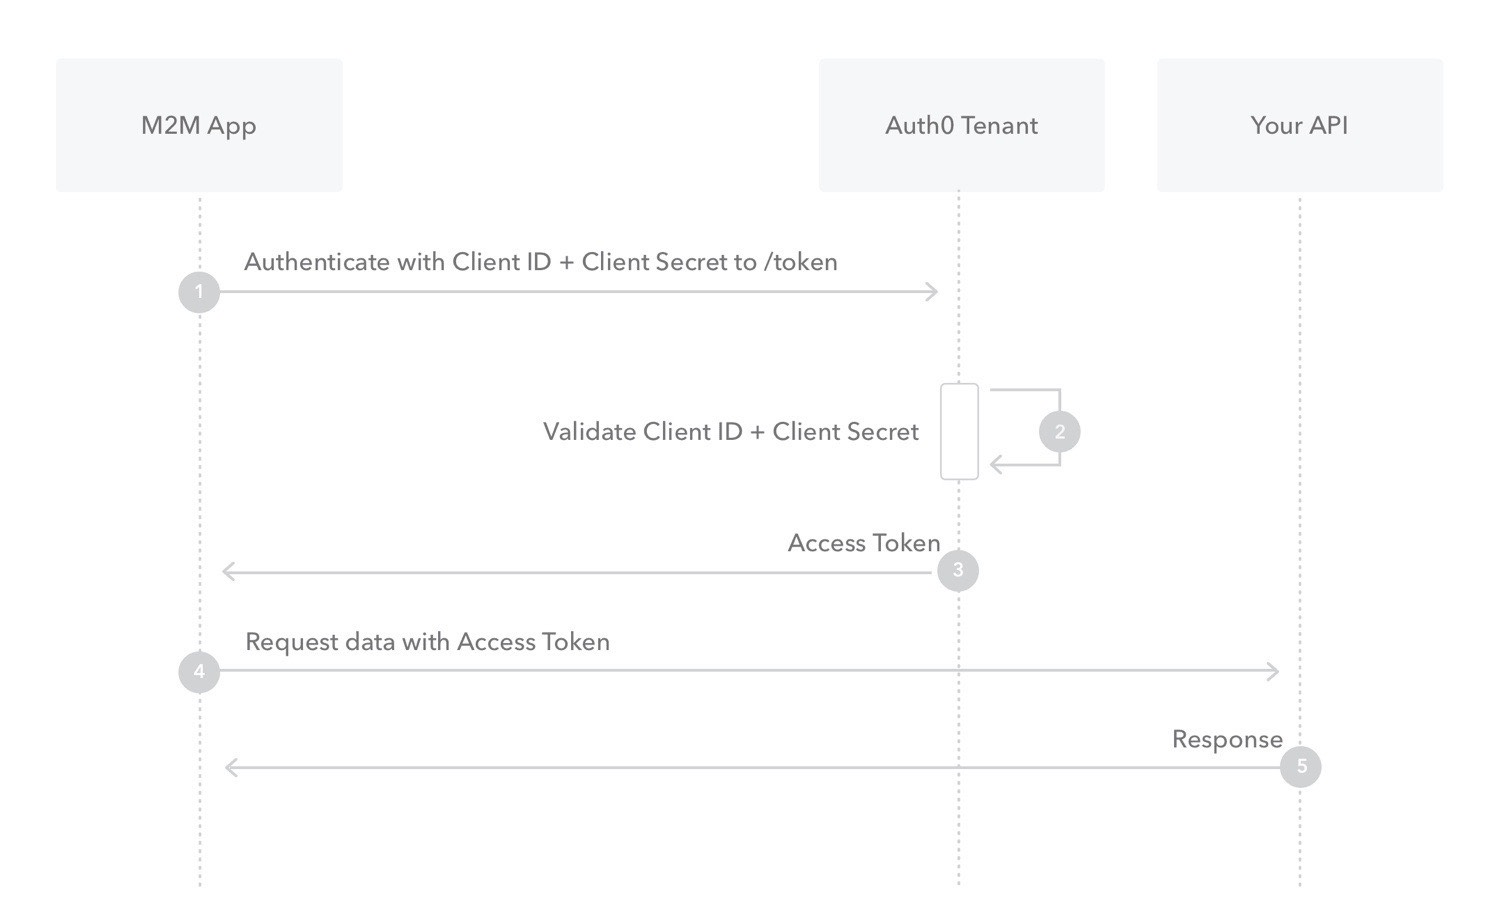
- Your app authenticates with the ATM Authorization Server using its Client ID and Client Secret (/oauth/token endpoint).
- Your Auth0 Authorization Server validates the Client ID and Client Secret.
- Your Auth0 Authorization Server responds with an Access Token.
- Your application can use the Access Token to call an API on behalf of itself.
The API responds with the requested data.
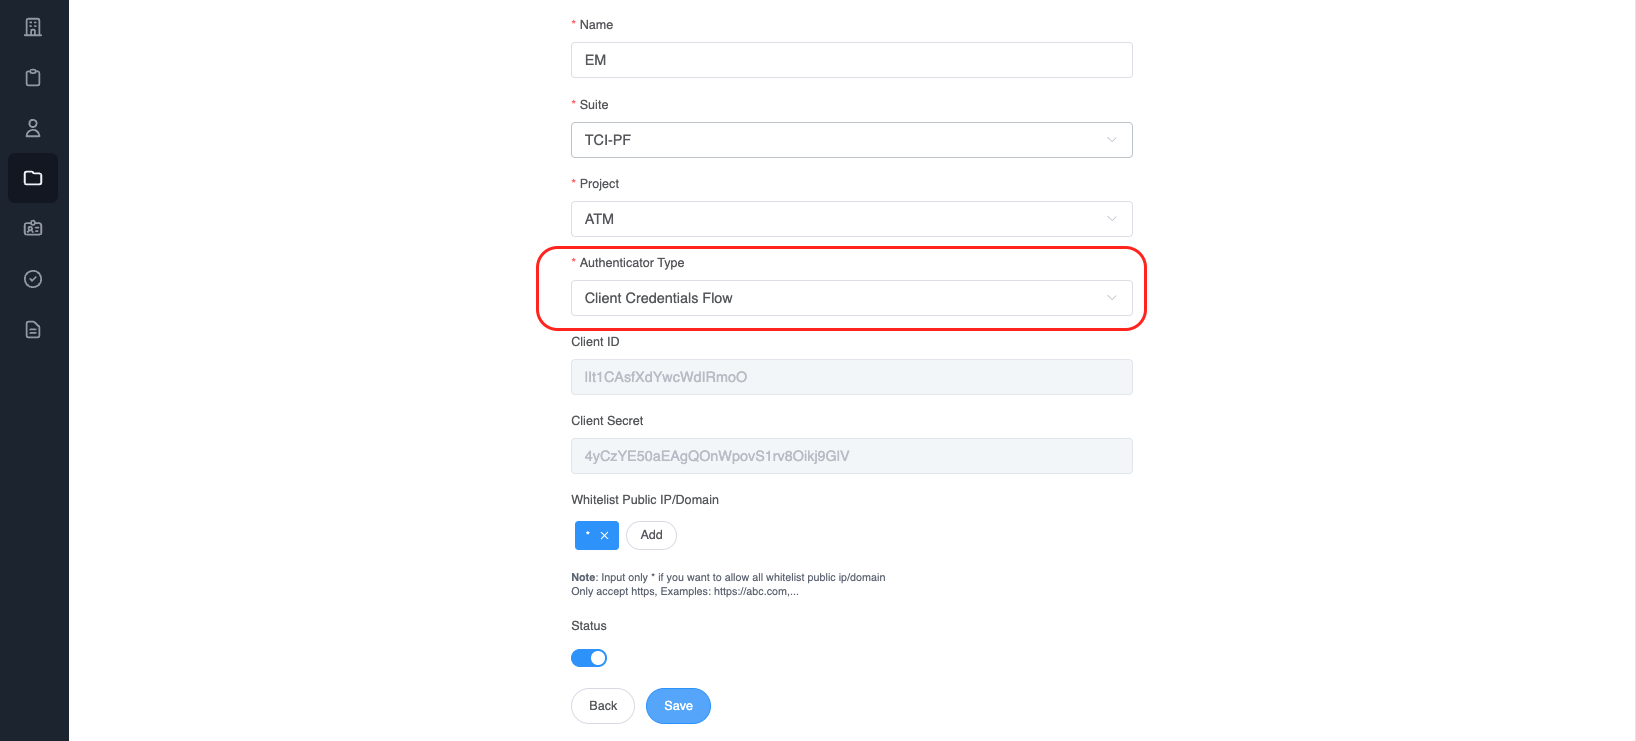
- Create Client Credentials
- Access the Application page
- Click on the Create button

- Choose
Authenticator TypeisClient Credentials Flow
- Integrate
After creating an application with an authentication type is client credentials. Call api to get token (Refer to this link)
* Api:
  Name: genTokenApp
  Path: /auth/token
  Method: POST
  Payload:
{
  "clientId": "NmN78x6DMfde1XRx9hQg",
  "clientSecret": "480nulBeBGqJDoAOADC0CW2frGTDVEmq",
  "grant_types": "client_credentials"
}
- clientId: Get value from application
- clientSecret: Get value from application
- grant_types: client credentials is authorization between machine and machine

Example:
var axios = require('axios');
var data = JSON.stringify({
  "clientId": "NmN78x6DMfde1XRx9hQg",
  "clientSecret": "480nulBeBGqJDoAOADC0CW2frGTDVEmq",
  "grant_types": "client_credentials"
});

var config = {
  method: 'post',
  url: 'https://api.dev.token.tci-pf.net/auth/token',
  headers: {
    'Content-Type': 'application/json'
  },
  data : data
};

axios(config)
.then(function (response) {
  console.log(JSON.stringify(response.data));
})
.catch(function (error) {
  console.log(error);
});
- Refresh the access token
Access tokens are short lived. Refresh them after they expire to continue accessing resources. You can do so by submitting another POST request to the /auth/token endpoint. Provide the refresh_token instead of the code (Refer to this link). Example:
* Api:
  Name: genTokenApp
  Path: /auth/token
  Method: POST
  Payload:
{
  "clientId": "DwSljVC4Ycr5YAv2Qbkf",
  "refresh_token": "",
  "id_token": "",
  "grantType": "refresh_token"
}
-clientId: Get from application
-grant_types: "refresh_token"

After authentication success, ATM will return the access token
var axios = require('axios');
var data = JSON.stringify({
  "clientId": "DwSljVC4Ycr5YAv2Qbkf",
  "refresh_token": "",
  "id_token": "",
  "grantType": "refresh_token"
});

var config = {
  method: 'post',
  url: 'https://api.dev.token.tci-pf.net/auth/token',
  headers: {
    'Content-Type': 'application/json'
  },
  data : data
};

axios(config)
.then(function (response) {
  console.log(JSON.stringify(response.data));
})
.catch(function (error) {
  console.log(error);
});
Response data:
{
    "access_token":"", // New access token
    "exp_access_token": 600 // Time expiration access token is 600 seconds
}
- How to validate the access token RSA 256
Call API to get the login key: (Refer to this link)
  * Api:
    Name: getJWKS
    Path: /auth/.well-known/jwks.json
    Method: GET

Example:
var jwksClient = require('jwks-rsa');
var client = jwksClient({
  jwksUri: 'https://api.dev.token.tci-pf.net/auth/.well-known/jwks.json'
});

function getKey(header, callback){
  client.getSigningKey(header.kid, function(err, key) {
    var signingKey = key.publicKey || key.rsaPublicKey;
    callback(null, signingKey);
  });
}

jwt.verify(token, getKey, options, function(err, decoded) {
  console.log(decoded)
});
Decoded token:
{
  "iat":1662429262,
  "iss":"atm",
  "exp":1662429442,
  "aud":"T_1kwjq0gTKGW6-g4O8OF"
}
- Experience of integration
- When the system verifies the token, it should cache JWKS file to improve performance